How to make an Android app
Android app development is done by many IDEs but nowadays it is mainly done in Android Studio based on IntelliJ IDEA. You can download an android studio from the Official website. The current version is 2.3.3. Before installing Android Studio you have to install the latest version of JDK from Oracle website Every project in Android Studio contains module(s) with source code files and resource files. Types of modules include:
- Android app modules
- Library modules
- Google App Engine modules
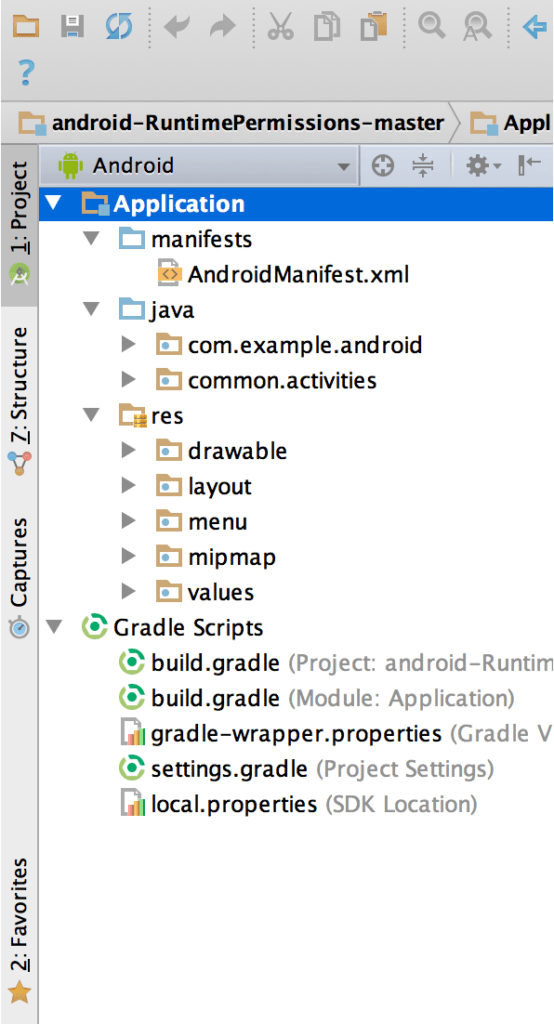
In Android Studio project files are displayed in different views, Android project view, as shown in figure 1 is the default view. This view of the modules provides a quick access to the project source files. Each app module contains the following folders:
- manifests: Contains the AndroidManifest. xml file.
- java: Contains the Java source code files, including JUnit test code.
- res: Contains all resources which don’t involve codings, such as XML layouts, UI strings, and bitmap images.
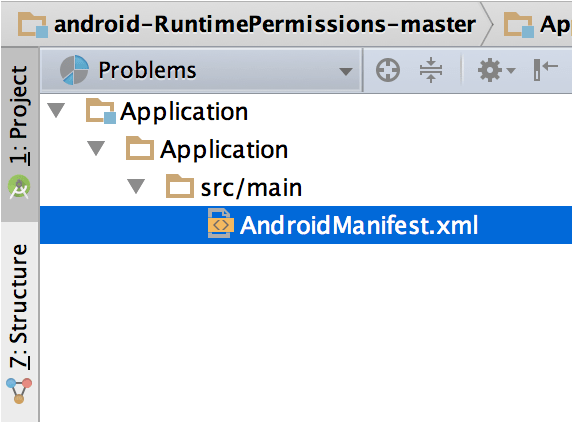
To view the actual structure of the project on computer disk, select Project from the Project dropdown. The view of the project files can be customized to focus on specific aspects of your app development. For example, If you select the Problems view it will display the links to the source files containing syntax errors, such as a missing XML element closing tag in a layout file.
The User Interface
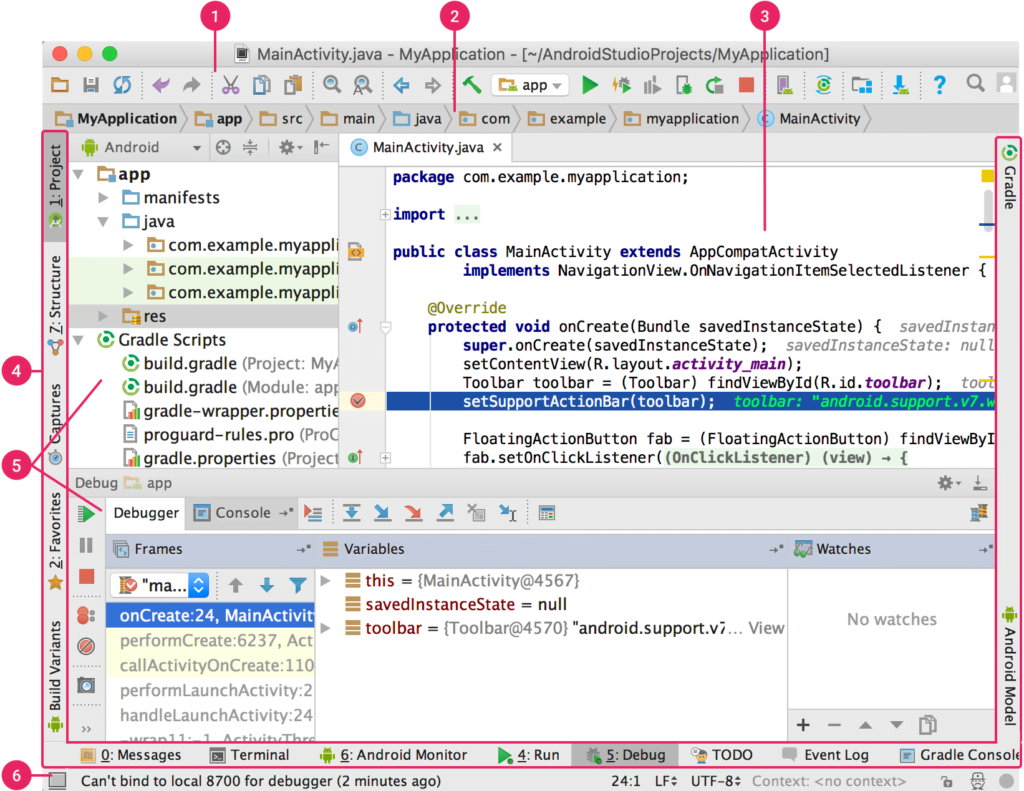
The main window of Android Studio consists of several logical areas identified in fig. 3.
How to make an Android app
- From the toolbar, you can do many things such as, running your app and launching Android tools.
- The navigation bar helps you navigate through your project and open files for editing. It provides a more compact view of the structure visible in the Project window.
- In the editor window, you can create and modify the code. Depending on the current file type, the editor can change. For example, when viewing a layout file(XML), the editor displays the Layout Editor while you make the android app.
- The tool window bar contains the buttons that allow you to expand or collapse individual tool windows.
- The tool windows give you access to specific tasks like project management, search, version control, and more. You can expand and collapse them.
- The status bar shows the status of the project and the IDE itself and warnings or messages. You have to know JAVA programming language to program an app. If you have no prior experience with Java then don’t worry you can go to www.udacity.com and register for a free course on Android programming for beginners. If you want to have detailed knowledge of Java you can also find a course on Java programming at Udacity. But the Android course is self-sufficient.

Making your first android app
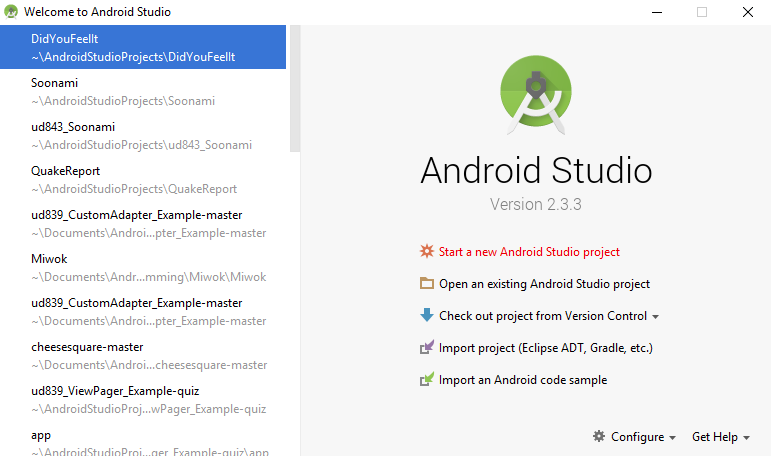
From programs menu open android studio it will open like this
A menu like this shown on next page will open click on “start a new android studio project” A dialogue box with create new activity will appear. Click on Start a new Android Studio Project. A new dialogue box will appear.
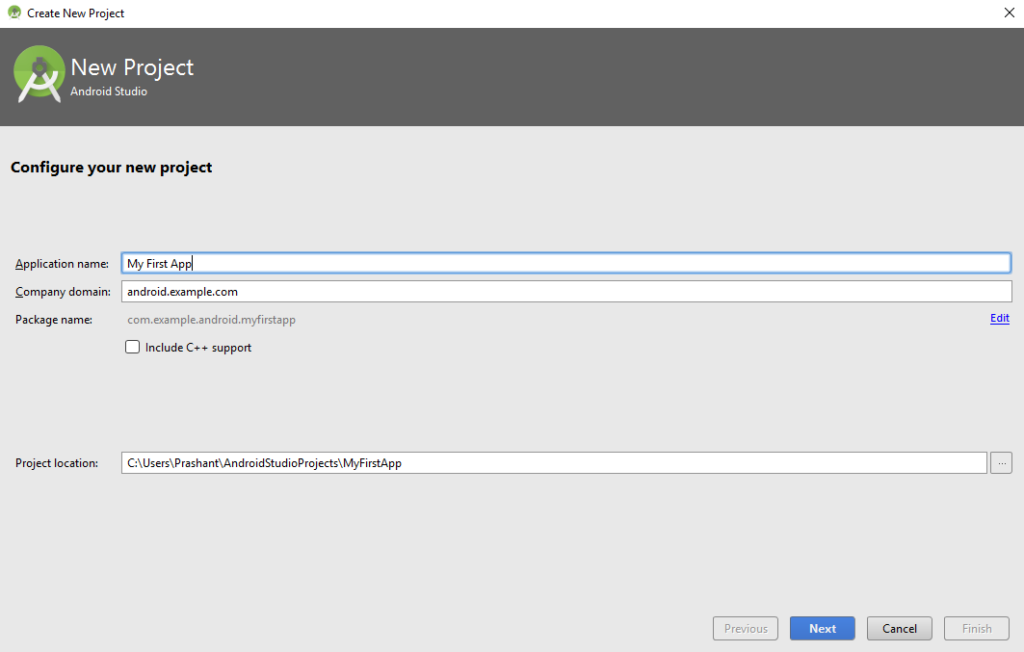
Write a name for your first project such as My First App
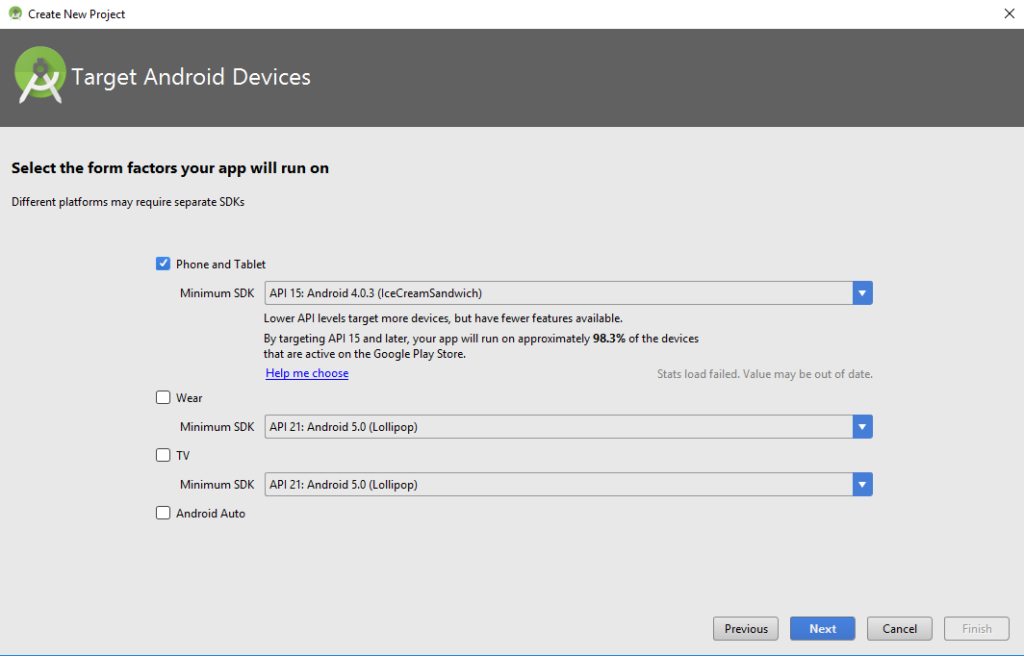
Now go to default selection phone and tablet. Leave the rest as it is and click next
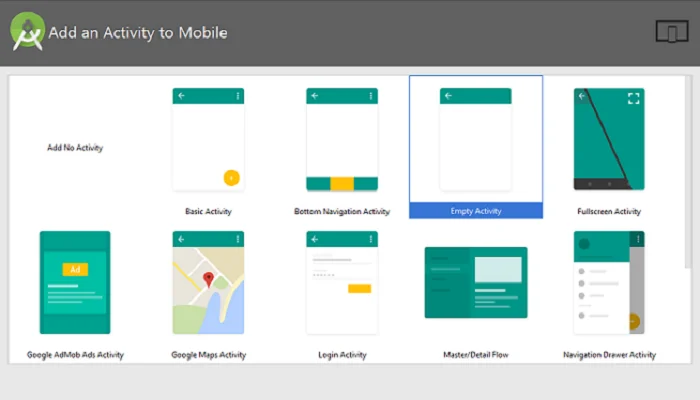
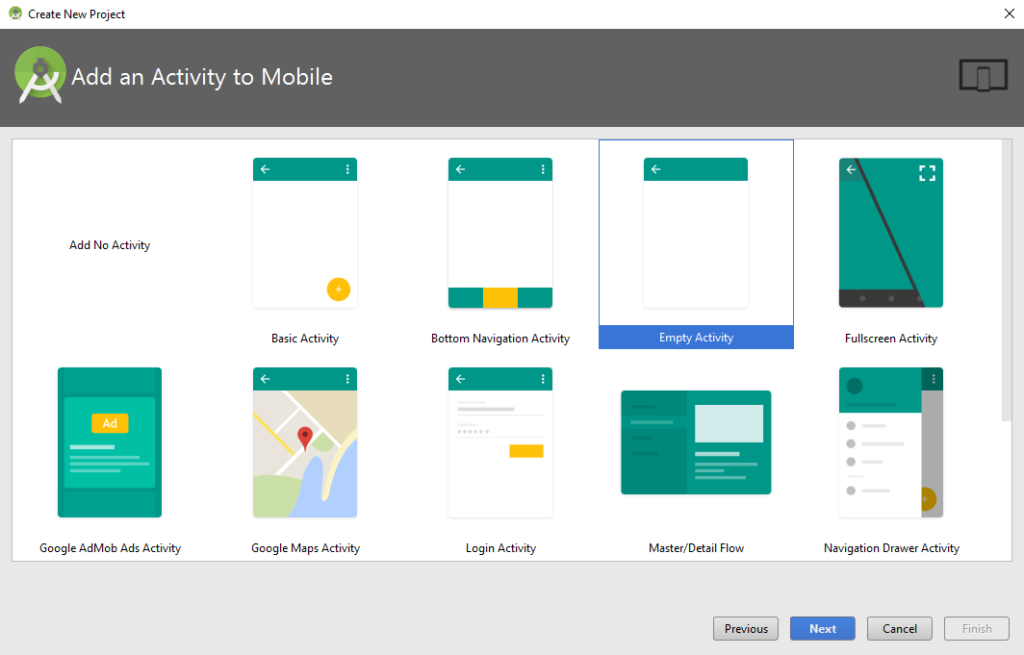
From the different layout options, you can choose any layout you like for first time just select Empty Activity and click next
A new dialogue box will appear, leave it as it is and click Finish and wait until Android Studio loads the project.

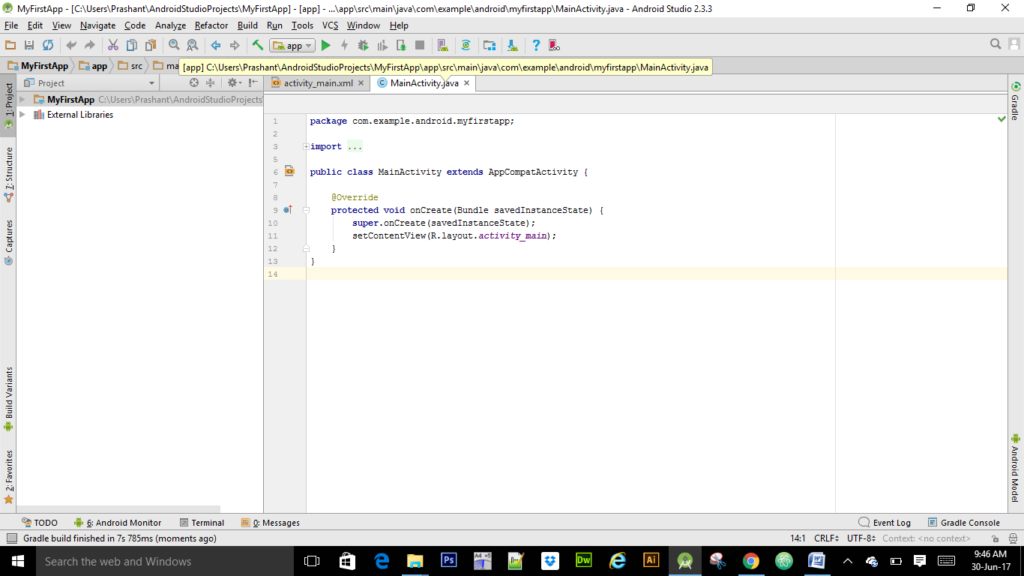
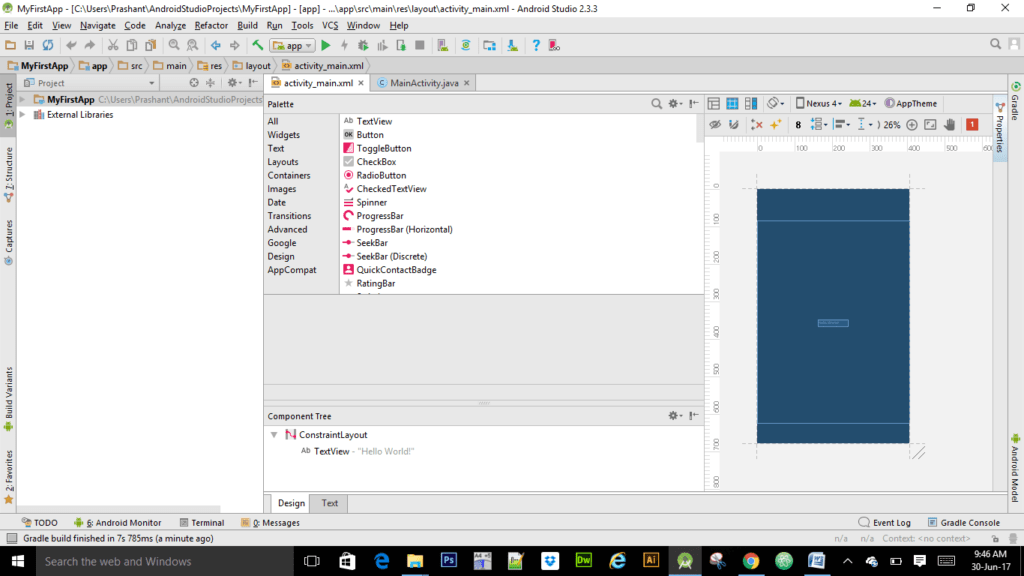
When android studio will load the project two tabs will be open. The MainActivity.java which contains the Java codes which control the functionality of the app and activity_main.xml which contains the layout of the app.
To install this Empty App on your Android you need to connect your phone to the computer through a USB cable. But before that, you need to enable USB debugging mode on your phone.
How to enable USB debugging mode on your Android device: Navigate to Settings > About Phone > scroll to the bottom > tap Build number seven (7) times. You’ll get a short pop-up in the lower area of your display saying that you’re now a developer. 2. Go back and now access the Developer Options menu, check ‘USB debugging’ and click OK on the prompt.

Now connect your phone to your computer and click the Run app button shown with the red circle mark, and your app will install. This will be an empty app to make an app of desired functionality you can learn how to make an Android app and stat doing android app programming from Udacity. Goodluck…