Introduction
In the modern world, radar systems are widely used for detecting and tracking objects in various fields such as aviation, defence, autonomous vehicles, and robotics. Building a radar system may sound complex, but with the help of an Arduino UNO, a servo motor, and an ultrasonic sensor, you can create a basic but fully functional radar that scans the environment and displays the distance of nearby objects.
This project is ideal for electronics enthusiasts, school science projects, or anyone interested in learning the fundamentals of sensors and automation.
Objective
The objective of this project is to build a rotating radar using simple and affordable components. The radar will detect obstacles in its range and output the distance and angle of the object through the Serial Monitor. The concept is to simulate how real-life radars detect obstacles by rotating a sensor and measuring the time it takes for a signal to bounce back.
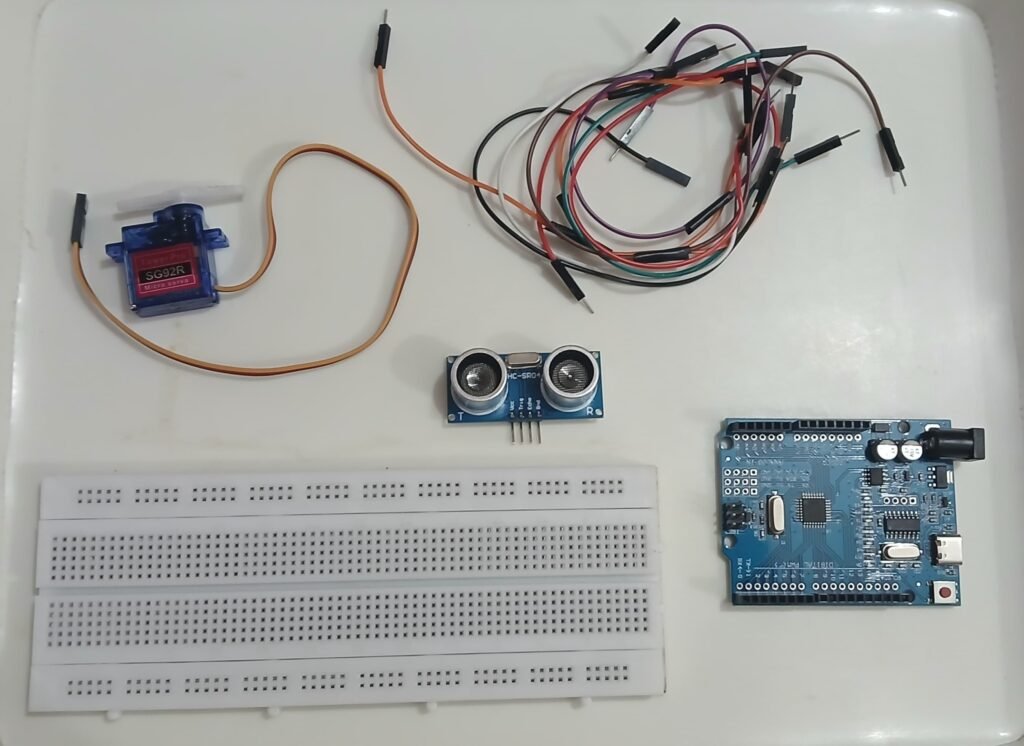
Components Required
Here is the list of components needed to build this radar system:
| Component | Quantity | Description |
| Arduino UNO | 1 | The microcontroller that acts as the brain of the project |
| Ultrasonic Sensor (HC-SR04) | 1 | To detect distance using sound waves |
| Servo Motor (SG90) | 1 | Rotates the ultrasonic sensor back and forth |
| Breadboard | 1 | Used to make easy connections without soldering |
| Jumper Wires (Male-Male) | ~10 | For connecting components together |
| USB Cable | 1 | For uploading code and powering the Arduino |
| Laptop/PC with Arduino IDE | 1 | To write and upload the code |
Understanding the Components
Arduino UNO
The Arduino UNO is an open-source microcontroller board based on the ATmega328P. It is widely used in DIY electronics projects because of its ease of use and rich community support.
Ultrasonic Sensor
This sensor measures the distance to an object by sending out a sound wave and calculating the time it takes to return. It consists of a trigger pin to send out a pulse and an echo pin to receive it.
Servo Motor
The servo is used to rotate the ultrasonic sensor. It allows precise control over angular position, which is crucial in simulating a sweeping radar motion.
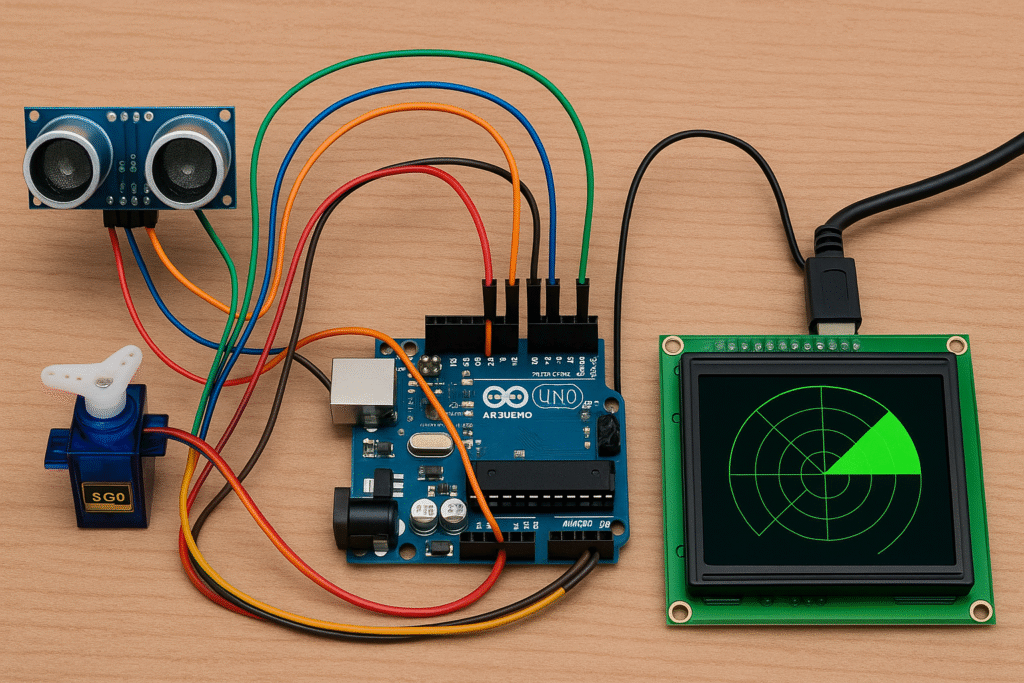
Circuit Diagram
Wiring Instructions
| Component | Connected To |
| Ultrasonic VCC | 5V on Arduino |
| Ultrasonic GND | GND on Arduino |
| Ultrasonic Trig | Digital Pin 10 |
| Ultrasonic Echo | Digital Pin 11 |
| Servo VCC | 5V on Arduino |
| Servo GND | GND on Arduino |
| Servo Signal | Digital Pin 12 |
Make sure to mount the ultrasonic sensor on top of the servo motor securely. This way, as the servo rotates, the sensor will scan the surroundings at different angles.
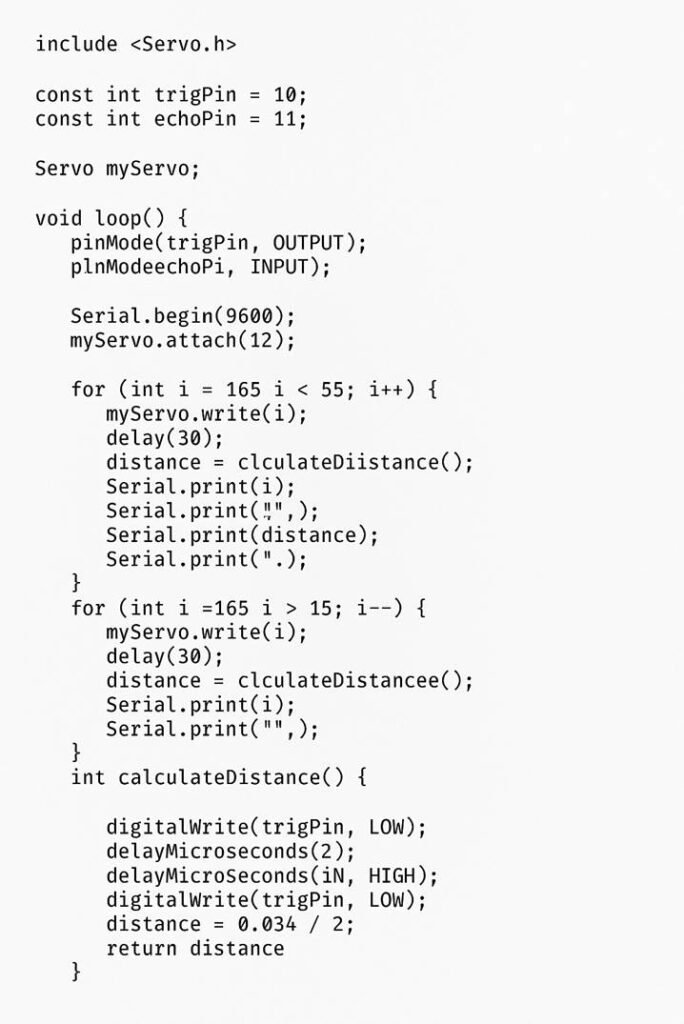
Arduino Code
Here is the complete code for the radar:
Step-by-Step Procedure
- Assemble the Circuit:
Connect all components on the breadboard as per the wiring table above. Make sure there are no loose connections. - Attach the Sensor to the Servo:
Use glue, double-sided tape, or screws to mount the ultrasonic sensor firmly on the servo motor. - Upload the Code:
Open the Arduino IDE on your computer, paste the code provided above, and upload it to your Arduino UNO. - Open Serial Monitor:
Set the baud rate to 9600. You’ll start seeing angle and distance values being printed continuously. - Visualize (Optional):
If you want a radar-like display, use the Processing IDE to graphically visualize the data. You can find many open-source radar GUI codes for Processing online.
Expected Output
Once everything is set up and powered on:
- The servo motor will sweep from 15° to 165° and back.
- At each angle, the ultrasonic sensor will measure the distance to the nearest object in that direction.
- The angle and distance data will be displayed in the serial monitor.
- You can use this data to determine where obstacles are located within a 180° field.
Extensions and Improvements
You can improve this project further by:
- Adding an OLED or LCD screen to show readings in real-time.
- Connecting a buzzer to alert when an object is too close.
- Using Wi-Fi (ESP8266) or Bluetooth (HC-05) to send data wirelessly.
- Integrating this into a robotic system for obstacle avoidance.
Conclusion
This radar system is a great entry-level project to understand how sensors and motors work together to scan and detect objects. It combines hardware, software, and creativity, and can be the foundation for more complex automation and robotics systems.
With a few simple components and some lines of code, you’ve created a functional radar system using Arduino — something that has real-world applications in security, robotics, and beyond.